


XK X500 Aircam
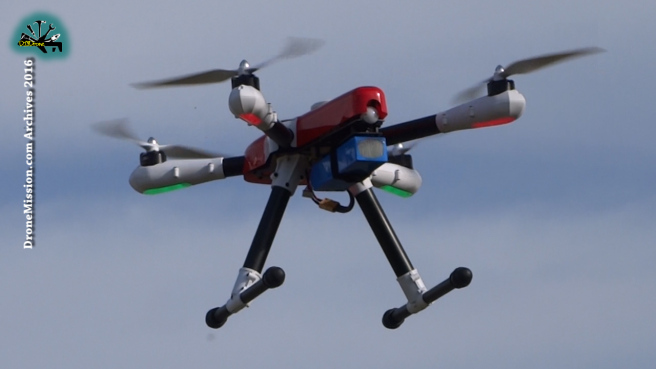
XK Aircam X500. XK has done it again with the 0.5m deviation Return Home (RTH), now with a budget 500 size quadcopter GPS drone, an impressive entry since the days of DJI Phantom 2, and Walkera Tali H500 class. A large community of RC pilots have been raving about the sibling x380 size, can now move up the next size, 500mm wheel base
 Head Lock Mode:
I have never used to be a fan of Intelligent Orientation Control aka Head Lock mode, but have begun to appreciate it as alternate way to return home without GPS. Using compass, forward is forward, backward is pulling back, left is left, right is right, regardless of which direction the aircraft is facing. However, Head Lock mode is relative to where you are standing during take off, so if you decide to walk across the street and face the opposite way, you may just get confused with the direction you need to face…
Specifications:
Material: high imitation carbon fiber grain
Wheel base: 500mm
Quadcopter size: 430*400*208mm
Quadcopter weight: 1300g
Flight weight: 1800g
Flight time: about 30 minutes
Charging time: 2 hour
Remote control mode: 2.4G
Control distance: 1000m
Motor: 2808 660/KV 4pcs
Battery: 14.8V 5400mAh 20C
Color: red & white
► Find Where To Buy
- x500: http://dronemission.com/find/xk-aircam-x500.php
- x380: http://dronemission.com/find/detect-x380.php
- G-2D gimbal: http://dronemission.com/find/g2d-gimbal.php
Features:
GPS positioning, plus or minus 0.5 meters.
Compass: ordinary headless mode and super headless mode
Automatic return to home
Fail-Safe
Two levels of low voltage protection
One key take off
One key landing
The maiden first flight Return Home landed just over a foot, which is insanely good.
Calibration:
Find a flat surface, preferably concrete, not grass to do calibration.
Power on radio and than quad. Best practice is to not move or shove your LiPo cables until the quadcopter has completed it’s bind and self-leveling, or better still wait for the GPS lock. Leave the wires alone!
When to cailibrate:
1. When you change venue a long way from your last flying location (greater than 100 miles).
2. When your quadcopter is drifting or rotating in a “toilet bowl effect” fashion. The inclination and deviation has to be corrected through compass calibration. The inconsistencies between GPS and compass will cause that swirling motion, in a tug-of -war for direction.
3. After a firmware upgrade, as it may carry the factory magnetic values.
Horizontal calibration:
Lower the throttle stick and toggle the Head-lock switch for about 3 times. You should see a solid green indicator
Rotate around 2 times, horizontally and ensure the horizontal green indicator always stays on.
Vertical calibration:
Lower the throttle stick and toggle the Head-lock switch for about 3 times. You should see no lights
You should see a solid red indicator when your quadcopter is vertical. Rotate around 2 times, keep it vertical and ensure the vertical red indicator always stays on.
Lower the throttle stick and toggle the Head-lock for about 3 times to save your new compass magnetic inclination and deviation values.
I found that completing an Auto Take Off is one good way to perform a pre-flight check, to ensure the quadcopter is behaving properly. If it begins to drift off to the side and not hold it’s position on take-off, I will land manually immediately, inspect the quadcopter, the gps, the extra weight center of gravity (CG), recalibrate if needed.
Gimbal setup notes:
The gimbal power 12v cable and the JR signal cable are included, just no instructions. Gimbal pitch uses the M7/F1 JR port on the output side of the Flight Controller with the signal wire white at the top. You can than use the FAB dial to pitch the camera.
A known fact on XK radios, you may have to rotate twice to pitch 45 degrees. A Walkera G-2D works fine, it is properly grounded. Just renemver to exclude the power red wire leading to the gimbal.


Leave a Reply
You must be logged in to post a comment.