Tag Archives: frsky
RMILEC Signal Converter V3 SBus PWM PPM
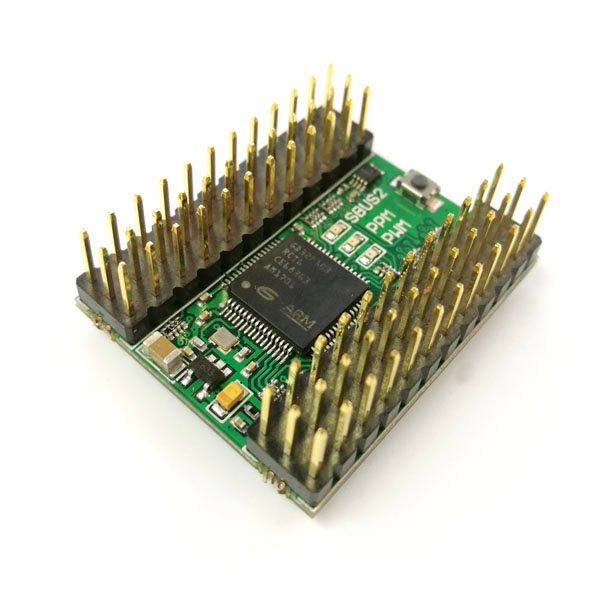
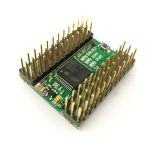
RMILEC Signal Converter Signal Analyzer V3. If you want to test or fly with a SBus receiver without a flight controller the old fashion way, you are in luck; this signal converter is able to convert SBus signal into PWM signal and two-way PPM signal. It can also convert PWM signal into PPM signal and SBUS signal, or convert two-way PPM signal into PWM signals and SBUS signals. Amazing! I will take some video to give you some ideas of what you can potentially use it for, probably more ideas than I can suggest.
 Besides debugging signals, we plan to use the FrSky R9 MM, the latest long-range 900MHz mini receiver on a plane, so one option is to use RMILEC signal converter and connect directly to each servo leads. The RMILEC Signal Converter carries a small footprint, about a size of a SD card. There is also an older version that incorporate a LiPo alarm of this converter, in that way it also function as a low voltage warning system…
Motive-RC R8SB Telemetry Receiver on Taranis X-Lite
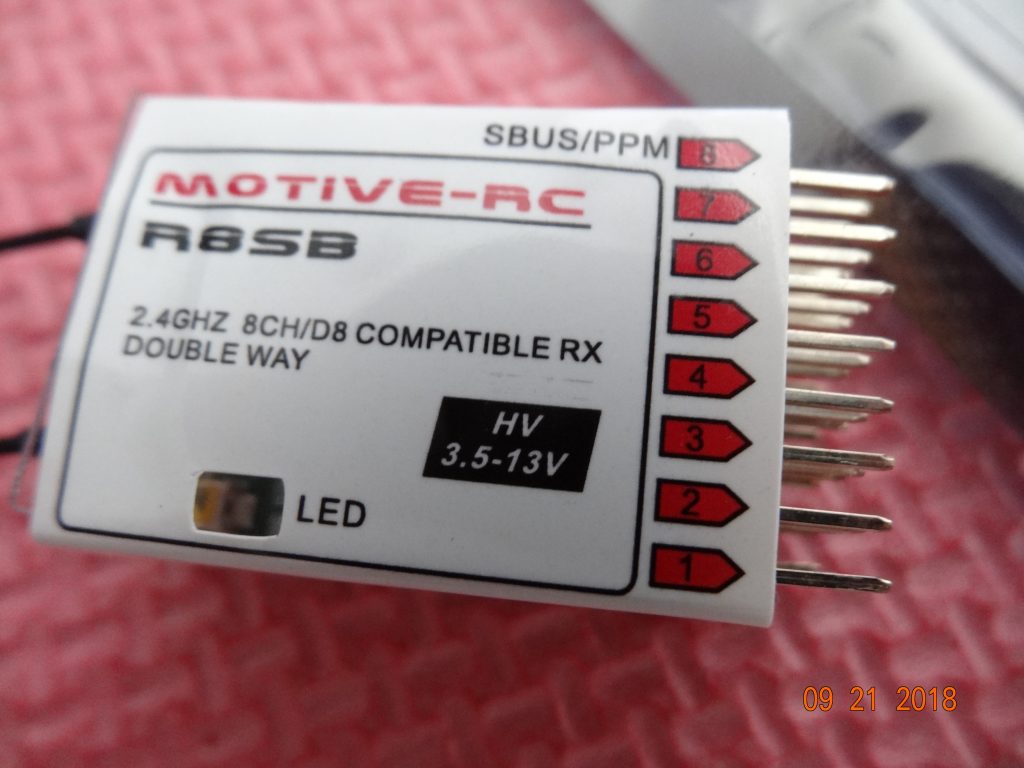
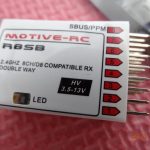
I still fly lots of planes the old school way, without any flight controllers, so this Motive RC R8SB all-in-one receiver even though a D8, it allows me to use my Taranis radio transmitter and most of the features. Add a voltage sensor and I am all set. The receiver comes with various model type SBUS, physical channel PWM outputs, PPM and RSSI. The RSSI warns me about the signal strength before I fly too far out. Here is a video on how I add a RSSI bar to my X-Lite screen using the Motive-RC R8SB.
 The R8SB is like the FrSky V8R7-II receiver but with telemetry functions. It bound instantly and lights up like a green lantern. There are more pins than a usual receiver, but they are nicely color coded to help me determine signal, power and ground. The upper set of pins are your 8 channels or SBUS/PPM. The lower set of pins are RSSI, two analog telemetry ports (A1&A2), A1 for internal receiver battery voltage sensor, A2 for external battery voltage sensor (0~30V, 1~6S) and one digital data-stream port (Rx, Tx)…
FrSky Taranis X-LITE Review Spring Unloaded
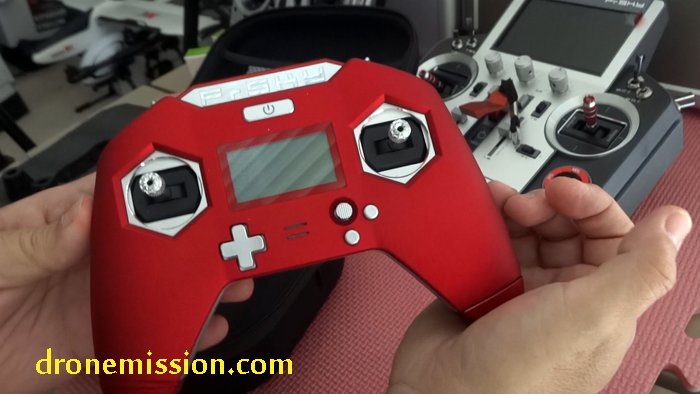
Introducing the FrSky Taranis X-LITE, the ultimate gaming radio transmitter. Made to match the ergonomic modern design of a gaming remote control, this radio transmitter has all the capabilities of a traditional radio and more.
One advantage of this FrSky radio is I can switch out to a R9M 900MHz frequency system for long range, low latency, going as far as 10 km.
First impression is good, it is more refine than anticipated. The speaker sound is so much more superior than the Taranis X9D . Equipped with the latest M12 Lite hall sensor gimbals. Hall sensor gimbals are more precise and durable than traditional gimbals using potentiometers. The switches may feel a little too small, but for casual flying (not competitive racing), this radio does just fine…
Eachine Mirage E500 VTOL Vertical Take-Off Landing
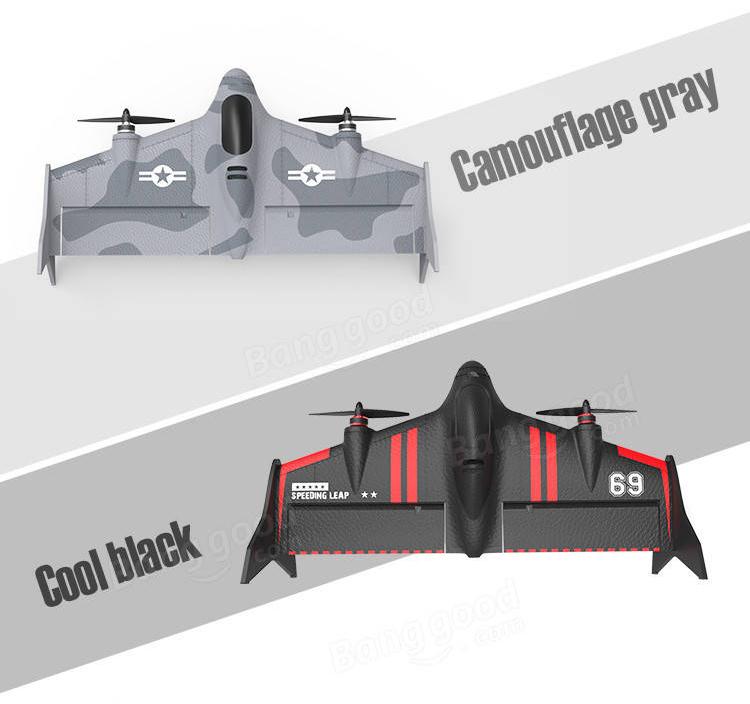
A vertical take-off and landing (VTOL) aircraft is one that can hover, take off, and land vertically. Eachine recently released a budget Mirage E500 VTOL Wing, and this is great venture into the next generation of radio control aircrafts. When I can take-off and land vertically, I don’t have to worry about a runway.
We received a bind and fly sample to test, and with it includes a basic 3rd party FrSky receiver to complete the tests…
FrSky Taranis and APM 2.6 Camera Gimbal Flight Test
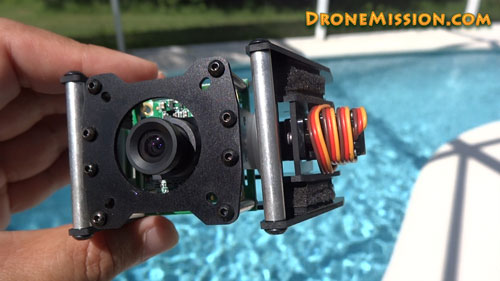
Storyline: A clear day on October 2013, out to test a completely new quadcopter we built, along with a fantastic combination of new gears. The first scene starts off with the Taranis and build-in Gimbal test, as that was new and a highlight to this flight (everything is new except the video camera). The gimbal was managed by Ardupilot (a flight controller, basically a computer) that kept the camera level at all times during accelerations and dives. We have never used the gimbal function (A10) before, so that was exciting to see how it handles video. Entering Pirate’s Cove (0:18), that was filmed at 60 frames per second with a Sony DSC-HX30V camera, and frame rate was reduced by 50% (30 fps) giving a smooth slow motion effect. A signature shot of the aircraft added to a moving car scene and then back to the sequence showing a couple taking photos of the big shark. At 0:45, we began the flight in first person view, another classic signature shot with the props spinning and the motors running (got to have that sound of the motors spinning up). The flight scenes were shot with a keychain camera #16 Lens D as that was the lightest and easiest way to video anything.
The control over this new quadcopter was excellent, maybe it was the Taranis or maybe the Opto ESC and DJI motors, or maybe just a combination of everything and the design…