


Hubsan X4 H502E GPS Drone
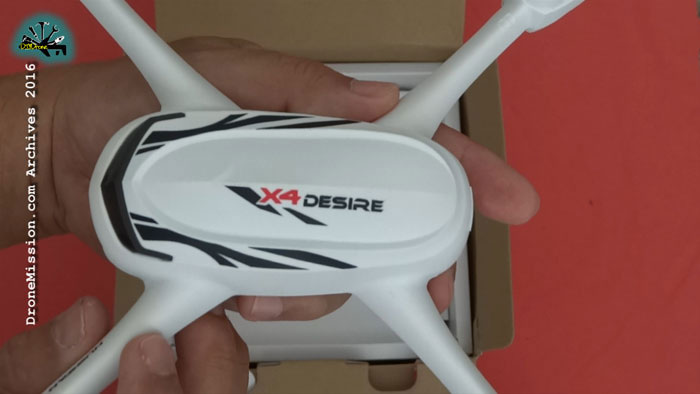
Looking for the perfect size quadcopter for this summer free youth RC training camp has narrowed down to this quiet 16.5 cm Hubsan X4 H502EGPS quadcopter. What caught our initial attention is the mini quadcopter with GPS, allowing the quadcopter to find it ways back. Other features of interest is it’s 720p camera and altitude hold.
 The Hubsan H502e arrived in a small box with no instruction manual, but the usual short instructions on the packaging that reference a manual. The H502e is not even listed at Hubsan.com as such there is nothing to download.
User Segment
Beginners, Park Flyers, Ready To Fly, Off the shelves, Hubsan Collectors, Instructional Training Quadcopter, Budget USD$107 MAP (Jun 2016)
Factory Specifications
Radio Frequency: 2.4G
Channel: 4CH
Quad copter Size: 165 x 165 x 60mm
Weight (including the battery): 140-147g DM certified
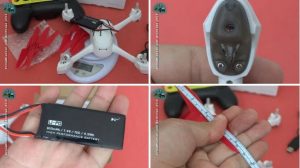
Battery: 7.4V (2S) 610mAh LiPo Battery 35g
Built-in HD camera 720P .
Motor: coreless 0820 x4
4 LED indicators with rubber feet
Max flight radius: 200±15 m
Flight time: around 10-12 minutes
Charging time: around 30-40minutes .
Transmitter battery: 4 x AAA
Flight Characteristic
Slow and sticky to position hold even at expert mode on stock radio transmitter. However it binds with the X4 Pro FPV1 radio transmitter allowing you to fly in manual, gps and follow me mode.
What To Expect If This Your First
There is no user manual included.
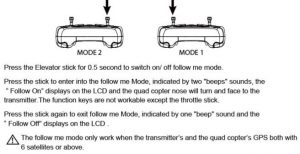
You can easily spend 12 minutes on each flight, setting up and flying. The actual flight may last 8-12 minutes from our tests. On a Mode 2 radio transmitter, throttle stick is on the left.
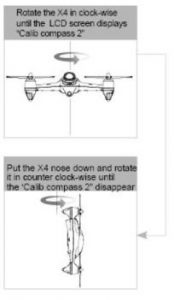
Power on your quadcopter first, than the radio. Connect your battery to your copter, lay the copter flat on a hard surface immediately. This will allow the copter to self-level the gyroscope. Begin step 1 of calibration by rotating it horizonally a few round clockwise until the radio transmitter prompts you to complete step calibrate compass 2. Next, vertically rotate the quadcopter clockwise until the radio indicates complete.
When you are ready to fly, hold both sticks inward to arm the motors, the propellers will begin to rotate slowly. The quadcopter is now live and has entered into flight preparation mode. Motors does not auto shut off upon landing, disarm idling motors to avoid toppling over. To stop the motors, hold both sticks inward at the lowest point for 3 seconds.
There are dual rates by pushing the right stick in and hearing two beeps. It also shows Expert Mode on the LCD screen. However it is still not a aggressive aircraft at all On the stock setting.
You can still maneuver the quadcopter during a GPS Return Home with the stock transmitter.
The copter LiPo battery may get a little warm after each flight. When the voltage is low (7.2 volts), it shows low battery on your radio (beeps on the FPV1), you should manually land within a minute to prevent the battery from over-discharging. Over-discharging a LiPo battery below 3 volts per cell, can permanently damage the battery. It is best to let the LiPo cool down before the next charge.
The odd size LiPo battery is not easily available. Included is a USB charger for a 2S LiPo, slow but a useful charger to have around or travel with.
Undocumented Features
To bind with the X4 Pro FPV1 radio transmitter, you hold down the ENTER and power on the transmitter to initialize a bind.
With the FPV1 radio transmitter, you can now fly in Manual or GPS mode
Testing Follow Me. The quadcopter is able to perform Follow Me, due to the Radio Transmitter GPS built-in system.
Rebinding to stock radio transmitter
The transmitter and the quadcopter are bined at factory, should you change transmitter or quadcopter, a relinked is required.
- Press the Photo function button while you turn on the transmitter simultaneously.
- Power the quadcopter and wait for the prompt to calibrate the quadcopter, indicating a bind has been established.
Similar Model Aircrafts
Users have recommended these 2015-2016 alternatives: Walkera Runner 250 GPS, Hubsan H501s, JYU Hornet S, Walkera MR Drone. (Your contribution welcome).
What we love about it
- Quick and effective GPS (12 satellites very quickly)
- Hardy ABS structure
- Telemetry on radio transmitter (gps, calibration etc)
- Returns home when signal is lost or when battery is low.
What is essential we hope to see in the next version
- User Manual and product information on Hubsan company website
- Allow for full acro or high rates setup, as it seem to lack energy.

To calibrate radio transmitter stick
Mode 2: both Right stick to the top left and power on radio
Mode 1: both stocks apart to the top
Rotate all sticks in all corners
Hold any trim button on the right to end
You will lose the bind after calibrating, you will see a no RX indicator
To rebind the receiver
- Power the drone
- On the radio, hold the left shoulder button and power on the radio. Follow the radio screen instructions to calibrate the drone as per usual


Leave a Reply
You must be logged in to post a comment.